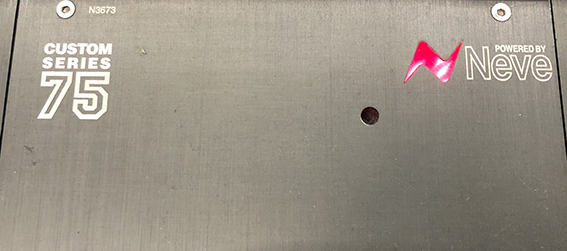
Neve Custom 75 w Brani Gerun
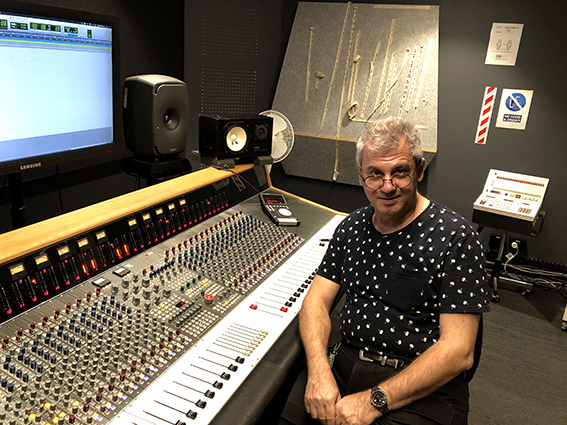
It’s in between trimester break, and as well as finishing some mixes for clients and a variety of my aliases, I have decided to finally take Senior Lecturer Brani Gerun up on the generous offer to have a quick crash course / masterclass on the Neve Custom 75 at SAE Sydney.

Below are a bunch of notes for myself, and any who may benefit:
- As with any console, especially one that gets used by a lot of students, it is good to know how to recall the initial setting – To do so hit RCL, then O and then RCL (recall) again in the centre of the console. The console will now be in record mode
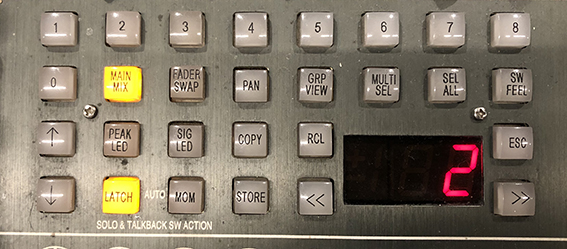
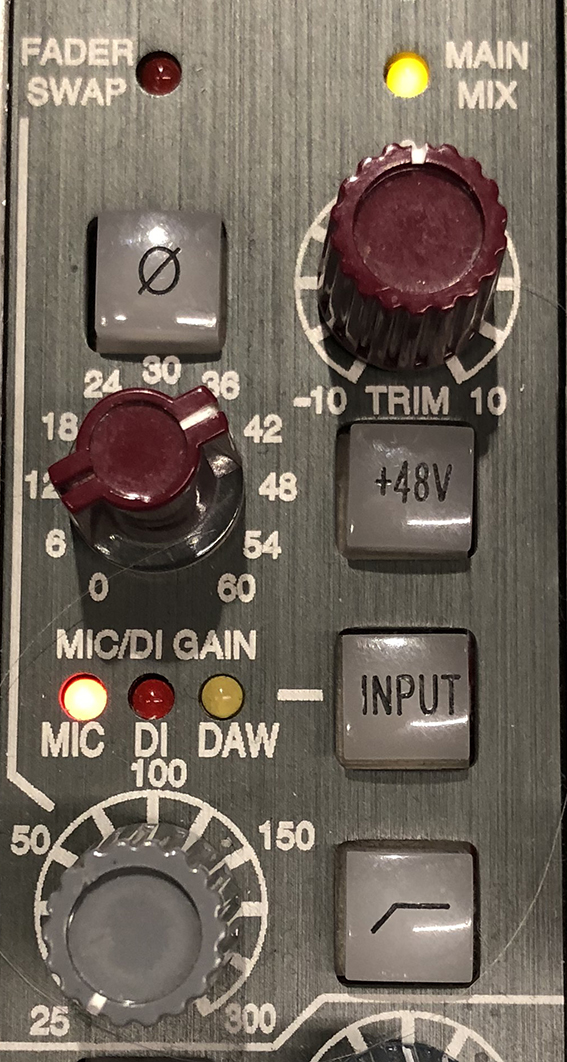
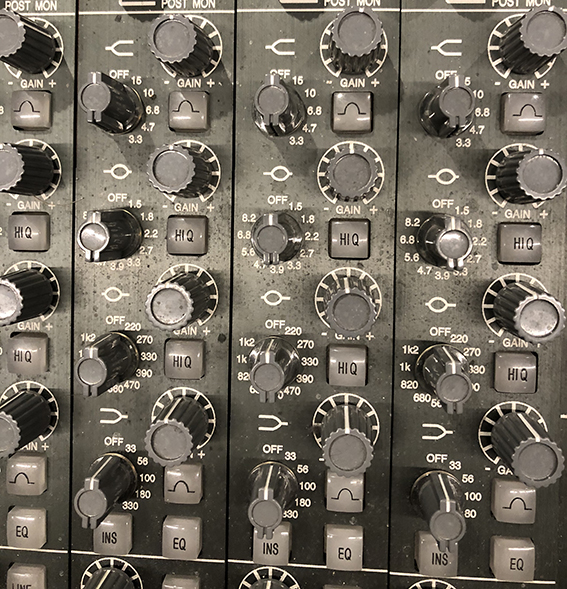
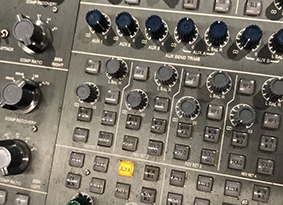
2. The main input path has 4 option, selectable by the input button – Mic, DI (no 48v automatically activated), DAW & line. Note the input paths can be changed globally for the desk by using the Channel Modes in the centre of console and holding down the CH INPUT button till all channels switch to the next input option. Also note that each channel strip has the usual Neve 6dB steps, a trim pot, phase flip, +48V and a HPF.

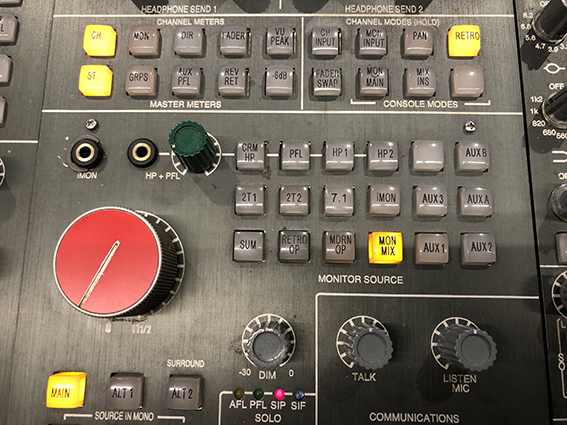
3. Auxes and headphone mixes – Aux 1 at the bottom, 5 Auxes, with Aux A & B being stereo. Note the gain pot when pressed will switch the Aux send from pre fader to post fader, for both channel path (default) and Monitor paths. Note Aux A & B share a gain pot, but can be isolated via the master Aux section in centre of the console. You can listen to the any of the Aux via choosing the Aux from the Monitor Source (note usually on Retro OP default). After dialling in the level you desire from each channel, turning up master Aux, potentially soloing / auditioning that Aux, the you need to allocate that Aux to the relevant Headphone channel in the Headphone section of the console. Note the green volume control increases will be effective for the listener on headphones but won’t be heard on the console. 12 o’clock is a good starting point. Re communicating to a performer on that headphone send you can hold down the relevant headphone channel or Aux in the communications part of the console, again 12 o’clock is a good starting position.


4. Neve EQ section, mirrors the 1081 EQ, note the EQ section, even individual parameters within the EQ, are only in the path when engaged. Also the EQ in only in the channel path not the monitor path (below the EQ section), so one must change the console input mode to DAW to use the EQ in a mix senario. Note the EQ section also contains the INSERT button and the INSERT is after the EQ. The patch bay is half normaled so the signal will go to the DAW regardless. Note the insert button can be used as a bypass button when judging an outboard compressor setting or equivalent patching decision.

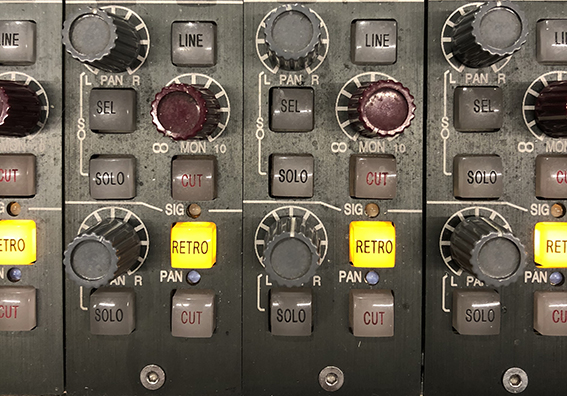
5. Second Audio Path, generally used as the monitoring path:
Solo, Cut, Level and Pan, you can choose select and change it in the centre of the console, DAW return is the default with no line light on. Note in default mode the big fader is input to DAW level the pot is the return from the DAW
6. Solo Section:
You have AFL (after fader listen), PFL (pre fader listen), SIP (keeps the signal where it is panned), SIF (solo in front) dims the rest of the mix.

7. Speaker selection:
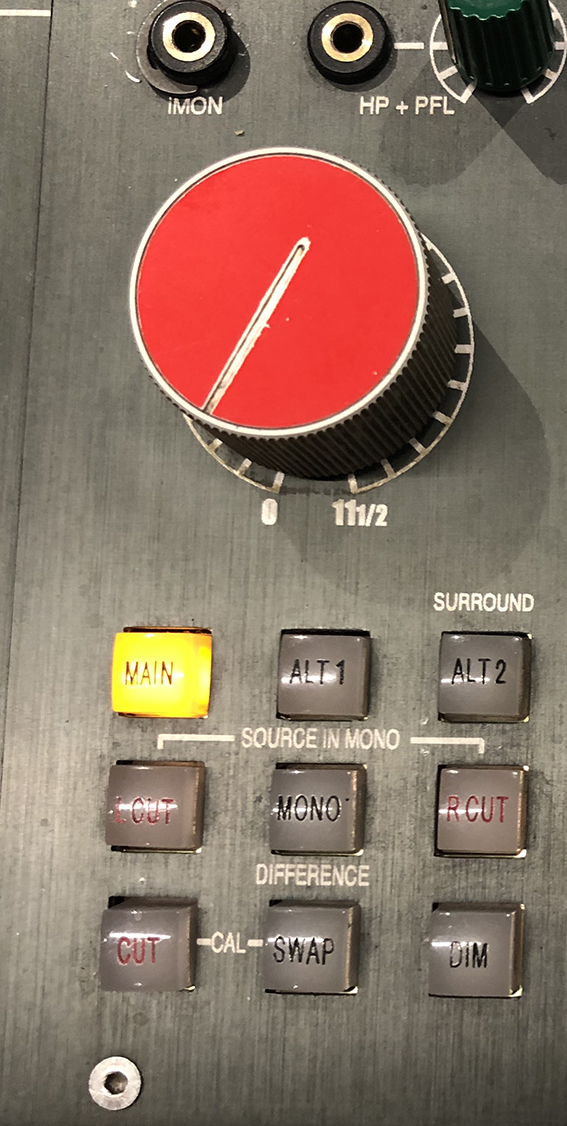
8. Faders and possible FEEDBACK! Each channel goes to the master bus and direct out, so if both faders up can cause feedback. You can select one channel at a time and take it out of main mix, but for now, Brani recommends we just use the Mon fader for most options. So leave all channels on main, and just use the monitor main red fader, and have the Monitor Source section of the console set to Mon Mix (see below).
 `
`
In default mode, the long faders feed tape / Pro Tools, but note the fader and pot relationship can be flipped globally in the Console Modes centre section via the Fader Flip button (see below). In that state, the bottom pots are feeding the recording medium and the fader is the return from that medium. NB in the Console Modes control section we can engage Fader Swap by holding it in, so that the small pots feed Pro Tools and the big faders return from the Pro Tools session. NB the HPF per channel also engage per channel the Fader Swap mode.
9. 2254 compressor / limiter: Note the Right VU meter is not working. The unit is available on the patch bay. Using the metering button you can meter the input, GR or output. Note left is on the bottom, it will take the compressor threshold from the side, left or right that has the lowest threshold. Also NB that the compressor make up gain is prior to the Limiter, so you can drive into the limiter if required.
10. Rev / Returns. The console has 4 reverb returns which are available on the patch bay, so the operator can for example set up a reverb on an Aux and then feed it back via the REV/RETs and then can choose via buttons whether that gets routed to Mon Mix, Main Mix or HP 1 or HP 2, there is a gain pot as well per channel to determine the level.
11. Traditional Neve design sums voltage, SSL sums current (voltage remains same), voltage summing uses transformers, current summing uses Op Amps, hence the more coloured sound of Voltage summing. On the patch bay the Retro Mix sums via transformers (Iron based), whereas the Modern Mix sums via op amps. To send to either summing path you can select per channel via the Retro button, note if not engaged it goes to the op amp / modern path. Note these can be change globally in the centre console modes.
To sum mixes chose your summing mode and patch from that and into “To DAW” channel desired, and then out of the “From DAW” channels.

And then patch to 2 Track Mon In, that way you can monitor post Pro Tools and really understand what is being recorded. NB don’t pull faders up of the channels as that will create a feedback loop.

…….
There is a long way to go but with this console, but I’m very grateful to Brani for helping start me on my journey with this console.


